


Hello all. My name is Tom Bramwell, and this is my first-ever online review of any piece of astrophotography gear. After taking a few months to get to know her, I wanted to finally review my new mount from Avalon Instruments of Italy, the “M-Uno Fast Reverse”. I felt it necessary to write this review due to how well this extremely unique product has performed so far and what it has done for both my images, and my enjoyment of astrophotography. I received my mount last December (2015), and true to form, it signaled the official start of El Niño here in Northern California.
Quite literally, the day I received my mount, it rained for nearly two months straight. True story. The first several weeks of its life were spent set-up in the middle of my home office, while I learned how to balance my different OTAs, configured my software, and apologized to the hardware gods that I had seemingly enraged with my purchase. As an homage to my M-Uno’s awesome power to control the weather, I decided to name her “Danza Della Pioggia” or “Rain Dance” in Italian. It seemed only fitting.
Before I get started, I need to thank fellow Avalon customer Derek Santiago for his amazing review of the M-Uno Fast Reverse on Cloudy Nights. His writeup was the only owner review of this mount I could find (at least in English), and it was absolutely informative. If you are serious about the M-Uno, stop reading this, and go follow the link above to read his review first, but then please come back. Go on, I’ll wait. :)
Taking a knee in amongst the sea of frustration
I’ll begin by giving a little background… I own 3 OTAs: A Celestron C8, EdgeHD 1100, and a smaller William-Optics wide-field refractor (currently awaiting imminent replacement with the new SVS80 sextuplet astrograph from Stellarvue). Previously, I owned two different Celestron equatorial mounts… an Advanced VX for my refractor and C8, and a more robust CGEM-DX for my larger 1100. For as long as I owned them, it seemed like I was perpetually working against my equipment. Either fighting periodic error, flipping at the meridian, or even just the daunting task of getting that heavy DX set up without angering my back. My evenings outside were always frustrating and seldom productive. Due to convenience and my work schedule, I tend to do most of my astrophotography in the back yard. To my east sits my two-story home; to the west is a large hill which blocks a lot of the direct city light from San Jose, but also eats up a ton of my horizon. Since I only see a very narrow sliver of the sky, flipping at the meridian was always a very big deal for me. If I only have a few hours per night per target, spending all sorts of time planning around the flip and re-framing my target afterwards was always a drain on my enthusiasm. Combine that with the fact that I couldn’t get the longer exposures my CCD camera likes for good, contrasty, low-noise images due to periodic error. My QSI 6120 really shines at 1800 seconds but I could seldom get exposures longer than 600 sec on my Celestron mounts without some huge ugly periodic error spike in the guiding, resulting in a wasted frame.
In addition to my frustrations with my mounts, I was also growing increasingly tired of Windows 7 and all its forced upgrade nonsense. I actually work for a certain “fruit company” in Silicon Valley, and having to use Windows with all of the issues it can bring, really aggravated me to no end. There just didn’t seem to be any Macintosh-based options available for the hardware I used. If I was going to research a new mount due to meridian flip, I also wanted to try to find Mac-compatible solutions for everything at at the same time. Camera/Intervalometer, mount, guiding, etc…
I began doing research on the dreaded meridian flip to see if I could find a mount that had engineered a way around the problem. It became pretty clear to me that my options were limited. One fairly common type of mount, a fork mount, doesn’t flip at the meridian but swapping OTA’s on a fork mount didn’t look all that easy to me. Most fork mounts actually seem custom-built for very specific OTAs. Additionally, targets towards the zenith could cause collision issues with the camera as it sweeps over the base of the mount between the forks. They also weigh an absolute freaking ton; possibly even heavier than my existing CGEM-DX with its ridiculous WWII battleship-grade tripod.
 Researching the Mac compatibility issue, I did find some interesting EQ mount options from Software Bisque in their Paramount line that are fully Mac-compatible, and will slew an hour or so past the meridian, but they still eventually have to stop and flip, which only postpones my problem; it doesn’t solve it. However, an hour past the meridian got me closer than anything else I was finding, so I explored them as a potential option. In my research, I found that Bisque was going to be at AIC, the Astro-Imaging Conference in downtown San Jose, only a few miles from home. I decided to go to the show with some friends armed with my checkbook, just in case they offered some show pricing on their mounts and see if maybe they could give me a product demo in-person. Who knows, maybe it could make my life at least partially easier. Unfortunately for Bisque, they didn’t bring any of their smaller mounts like the MyT or their MX with them to the show. I couldn’t get a demo, literature or anything. They seemed to be solely interested in the release of their new $20,000 Taurus Forkmountasaurus beast of a thing, which didn’t really interest me. My time at the Bisque booth was disappointingly brief, and I left the show empty-handed.
Shortly after, I happened upon Derek Santiago’s review on Cloudy Nights for the belt driven “M-Uno Fast Reverse”. It seems an Italian company named Avalon Instruments had a couple of mounts engineered specifically to operate from horizon to horizon, caring not about the meridian. They had two different models varying in size and payload capability. They are called the “M-Zero Fast Reverse” and “M-Uno Fast Reverse”
The ultra compact M-Zero is rated to carry around 13kg or roughly 30 lbs and can do so in an EQ or Alt/Azi configuration, while the larger/heavier M-Uno lists a payload capacity of 44 lbs (though Avalon has assured me it has comfortably slewed loads over 50 lbs with no problems, providing you make sure the payload is properly balanced). My EdgeHD 1100 with focal reducer, camera, filter wheel and all the accoutrement comes to about 40 lbs, so I was just within spec. The M-Uno seemed like the model that would slew all of my different gear, so that was where I focused my attention.
Reading Derek’s review, we seemed to share many concerns and desires in a mount. He was just as annoyed with meridian flip as I was, and had gone through much of the same futile search for a cure that I had. After reading his review, I decided to reach out to him and I’m glad I did. His love and appreciation of the M-Uno had only grown since his review and he was more than happy to talk about his experiences. He had inside information on what it was like to order the product through the sole US supplier, Deep Space Products in Phoenix, AZ and the level of support he had gotten directly from the manufacturer in Italy after his purchase. His positive impressions of both went a long way towards finalizing my decision. Being a PC user though, Derek couldn’t answer the Mac compatibility questions I had. For that, I’d have to talk to sales, or the manufacturer. No problem - merely discovering the existence of the M-Uno through Derek’s review was a watershed moment for me in astrophotography. #LifeChanger
I immediately contacted both Ed Thomas at Deep Space, and emailed Avalon’s information line about my intent to purchase, pending answers to a few questions I had. I was sure to mention the added Mac-platform “gotcha” in both of my information requests. Ed quickly responded with answers to my hardware questions, but was unsure about my Mac requirements. For that, he had to defer to Avalon.
To my surprise, Avalon’s president, Luciano Dal Sasso, personally responded to my email within 24 hours stating that he himself was a Mac user and they offered Mac compatibility with a host of different applications. One in particular, TheSkyX by Software Bisque for Mac, also supported my CCD, filter wheel, focuser and guidecam. (Funny, because that was the same company that disappointed at the show. We’re all good now though. The latest daily build of TheSkyX is killer.) At last a solution seemed within reach for me. Luciano did notify me in advance of one application that required a Windows PC to connect to the mount’s StarGo computer to configure it for lattitude/longitude and initial setup, but that a Macintosh version of this app was in the works and that once configured, the PC wouldn’t be needed to operate the mount. Since I did have a PC from my previous setup, this wasn’t a show-stopper for me. As long as its use was only occasional and temporary, I’d consider it a win. Luciano made sure that all of my questions were answered fully before ordering. In my communications with him, I really got a sense for his deep love of the product, and pride in what they have built. It was obvious by now they had won-over their third M-Uno customer in the United States. I was sold.
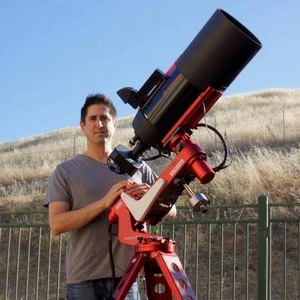
#PicsOrItDidntHappen: My EdgeHD 1100 riding atop Mt. Mountasaurus, laden with my worst-case scenario... On-axis guider, and Lodestar X2 guidecam. Horizon-eating hill in the background.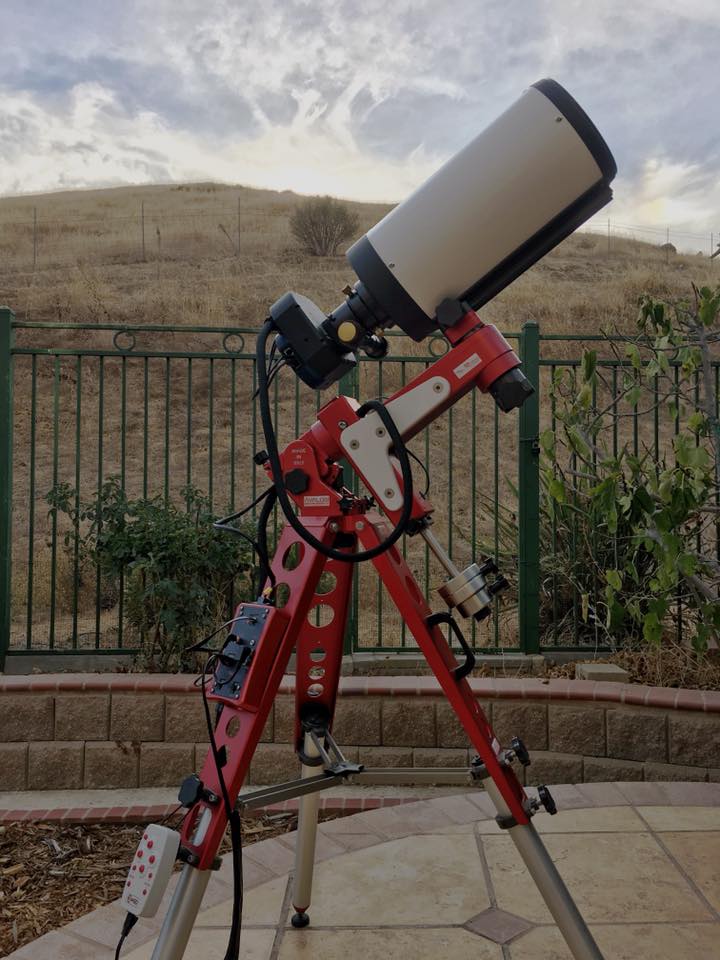 The purchase process was pretty straight forward. Deep Space Products is not a high-volume dealer, and the information available on their website can be a little sparse in areas, but once we had a complete list of what I wanted/needed, the order went off to Italy without a hitch. Ed is very good about returning emails within a day and getting your questions answered. During my ordering process, Luciano at Avalon remained in contact, and got a complete hardware inventory from me of what I would be looking to slew on the mount. Armed with that information, the Avalon team proceeded to mock-up my setup at their facility in Italy and discovered some shortcomings in balancing my largest OTA with my longest imaging train, and having it clear the RA axis. A lesser-known device in my inventory in particular called an On-Axis Guider (ONAG) really adds considerable length to my overall setup (see image above). It eats-up quite a bit of back focus and sends my already-lengthy Lodestar X2 guidecam straight out the back, making for a really long rig. This was regarded by Avalon as a sort-of worst case scenario for my mount and I am really glad they mocked it up. As a result of their labwork and discovery, they actually customized the fork arm for my unit to specifically allow easier balancing of that particular configuration. See, the position of the fork arm on the M-Uno is adjustable - you can vary its distance from the RA axis by removing 4 hex bolts per side, re-positioning the steel side brackets and bolting them back down. This allows the user to mount their OTA as close to the RA axis as possible, minimizing the amount of counterweight required to balance your payload. No more 15 lb hunks of iron hanging at the end of a 2-foot, 15 lb counterweight bar. No more risk of smashing your foot to a million pieces with one careless mistake. The M-Uno uses svelt little 1.2 and 3 lb counterweights on stubby steel rods that measure only inches in length.
The beautiful take-away here is, Avalon didn’t make me discover this on my own. They saw fit to test it for me in advance and spare me the disappointment and heartache of finding this out half-way around the world, after waiting months for delivery. I’ve never really experienced that level of support from an astronomy manufacturer, or in any other industry for that matter. This delighted and impressed me right out of the gate. They even went so far as to shoot custom demo videos for me and upload them to YouTube illustrating how different OTAs would mount and balance (no lie, see for yourself. Still pictures are cool ‘n all but more fun to watch them spin it around.)
Avalon’s customizations to my fork arm added some time to my delivery but I was kept up to date throughout and was assured that the modifications would be worth the extra time (...and they absolutely were). Within a couple of months the order found its way through customs to Ed in Phoenix where he tested and inventoried everything before sending it off to me. Shipping was insured and I had a tracking number within seconds of it being generated. Everything was expertly labeled and packed and arrived in flawless condition.
Life at 37ºN...
Unboxing was an event for the ages. I waited for my local astro buddy Dan Abbott to arrive so we could go through it all together. He had kept me reasonably calm during my agonizing wait for the mount’s arrival, so it only seemed fitting to wait for him to show up to share in the fun. Dan is a very talented machinist (Abbott’s Machine Services - Santa Clara, CA) and we were both reveling in the engineering and design logic of each part as we pulled them from their packaging. The obvious hours and hours of problem solving that had taken place in the creation of this mount, the fit and finish… With so many details to pour over, it was an absolute nerdfest. Everywhere that could be pocketed on the mount to reduce its weight has been. Every hard edge has been dutifully chamfered. All the index, elevation, and other markings are machined or laser etched. Nothing is stamped, cast, or half-a**ed. Their anodizing is absolutely gorgeous. With the turn of a single knob, the M-Uno grabs firmly onto your OTA’s rail without leaving a single mark on it, unlike the unexplainable double steel spikes of death on both the AVX and DX. A clever removable handle is included which securely clamps onto the top of the mount, enabling you to easily tote the M-Uno around with one hand like a briefcase, instead of having to hold a heavy mass in your arms like some sort of awkward, expensive, metallic baby. A polished chrome USB flash drive with stitched white leather magnetic cover adorned with the red Avalon logo came loaded with the latest firmware, documentation and software needed to configure my mount. Over the top? Perhaps, but it just kinda goes to show the level of detail they have gone through to present their product in the manner they feel it should be. After all, it is Italian.
Danza's first visit to Telescope Row / Halls Valley
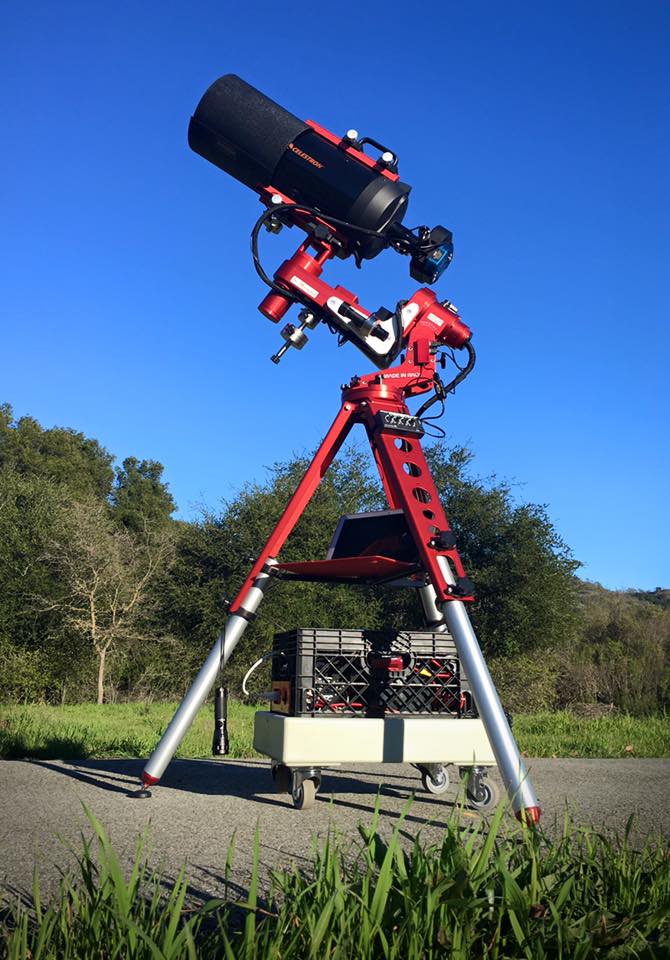
Avalon describes the M-Uno as a “single fork arm equatorial mount” which I guess is a fairly accurate description other than the possible negative connotations I had associated in my mind with fork mounts in my earlier research... and can you really call it a fork with only one tine? LOL - Kinda seems analogous to the sound of one hand clapping, but I’m splitting hairs... Avalon is the only company doing it, so they can call it whatever they want. I call it awesome. Where traditional fork mounts fail, the M-Uno’s unique design allows the OTA to perch way out away from the mount, reducing the risk of close-in collisions between your OTA/camera and your mount or tripod. It seems a bit precarious at first, seeing your expensive rig hanging out there in the air like that, like a bird out on a limb... but you quickly become accustomed to just how stout these mounts are and how much weight they’re capable of holding out at that distance... And you need to come to terms with it soon, before you see your gear hanging upside-down from it. :)
The M-Uno's polar axis - wire passage
What was originally intended to be the polar scope axis has actually turned out to be the coolest snag-free wiring path I’ve seen on any mount without its own internal cable management. Back on my CGEM-DX, I actually had my power cord snag once, and it ripped the 12v socket from the logic board, causing a several hundred dollar repair. Since then, I have been very very careful about my wiring. On the M-Uno, by running everything through the tunnel originally designed for the polar scope, you can neatly and safely route all of your wires away from any moving parts, which becomes critical when your mount is capable of slewing 180 degrees over the course of a night. That’s a lot of potential ripping force. I actually made my own custom wiring bus for my cameras’ power and USB cables, ST4 and autofocus cabling, all wrapped into one 1/2” thick nylon wrapped cable that feeds easily through the polar axis, making setup and teardown a total snap. Since running your wires through the polar axis does prevent a polar scope from working there, they have created a convenient side-saddle on the mount for a detachable polar scope which works quite well (see below). It was extremely easy to collimate and even comes with an illuminated reticle that plugs conveniently into a port on the mount when lining-up Polaris after dusk.
Riding side-saddle, Avalon's detachable polar scope with reticle illuminator installed
The alignment process on the M-Uno still seems like really cool voodoo magic to me. At first, for longer than I care to publicly admit, I was drastically over-thinking it. Coming from the alignment routines on my Celestron mounts, I was trying to make the process on my M-Uno WAY more difficult than it actually is. Luciano would tell me the precious few easy steps, I would follow them and it would work, then I would come along later and try again with my own opinions of what was right and fail miserably. He was so wonderfully patient, even staying up late on Italy time with me over Skype to ensure I was doing everything right (bless that man). But soon, I had it down. It really is this easy…
On the first setup, or after you move to a new location:
1. Configure latitude/longitude on the mount using the StarGo Utility, and give your location a name.
2. Configure the same location information in TheSkyX, or SkySafari, giving it the same case-sensitive name, connecting to the M-Uno’s StarGo computer using the classic LX200 protocol
After doing that, your initial alignment process on a typical deployment goes as follows:
1. Align to Polaris through the detachable polar scope.
2. Connect USB to the computer or connect via WiFi with an iPhone/iPad, launch TheSkyX or Sky Safari, and connect to the mount
3. Click or tap on any star on the meridian, towards the southern horizon on the sky chart
4. Click/tap sync - you can hear the faint hum of the motor start.
5. Now click/tap on any bright alignment star or planet and slew to it; center it in the finder scope or camera with the hand control or software controls and click/tap sync.
That’s pretty much it with regards to alignment. The process is the same if you’re using TheSkyX on Mac or Sky Safari on your iPhone. It only takes a couple of clicks/taps and a few seconds. It really makes Celestron’s ASPA routine look silly. From there, you’re either free to view to your heart’s content or if you’re going to be imaging, you can now do a familiar drift alignment in PHD2 to really get things dialed it in. On my imaging nights, I typically just hit the southern meridian star in step 3, and proceed right into PHD2’s drift alignment process. The entire drift alignment process is pretty straight forward. After doing it a few times, I can now nail it down in just a few minutes, long before astro-dark. Once I’m done there, I just do the equivalent of a precise GoTo in the Celestron world - I just pick a bright object closest to what I’m shooting, center it in my Telrad and hit sync, then slew to my photographic target and go to town. Super fast; no extra steps.
When you command the M-Uno to slew to an object and the motors spring to life, they sing you the most lovely tune as they spin up through their speeds. It really is musical. It’s not overly loud; to me it’s just right. When you slew the M-Uno around at star parties, everyone in the immediate area comes to see what’s making the pretty sound. If you have the luxury of running the mount solely off of AC power, you can set the M-Uno to 15v DC operation in the software and then set the provided AC adapter to 15v DC and go for the crazy-fast top slewing speed that goes full-soprano. I leave Danza set for 12v DC operation so I can easily transition between AC at home and DC for remote deployments without having to open the windows laptop to make a configuration change. This limits my fastest slewing speed but it’s still plenty fast enough for me. This YouTube video lets you hear the M-Uno in action. The audio level on the video is overly maxed-out... It is not this loud in person but it gives you a sense of the lovely music the M-Uno sings as it does your bidding The M-Uno's imbedded StarGo computer - Their very first WiFi unit shipped. I am honored.
One major difference I noticed right away between the M-Uno and my previous mounts is how autonomous it is. The M-Uno’s on-board computer, the StarGo, is the subtle masterpiece that runs the show. It speaks the very common LX200 protocol, and sits between your computer and the mount. You tell StarGo what to do and it tells the mount. If you suddenly lose power on your laptop or if you accidentally yank the USB cable, StarGo just keeps on going. When you reconnect your application to the StarGo, the M-Uno’s position is properly reported on the screen right where you left it, without any drama. The glee that came over me when I first discovered this is indescribable. I can’t tell you how many alignment do-overs I had to perform in my previous life. When I connected my Celestron mounts to my PC and controlled it via their über-buggy NexRemote software, if it crashed (as it did insanely often), god forbid you accidentally close the app, or your PC lost power, you were starting over. No more of that foolishment; not here.
The M-Uno hand controller
They now offer the StarGo in two versions - Bluetooth and WiFi. The Bluetooth version gets you compatibility with Android portable devices and the WiFi version works with iPhone/iPad devices. Being a Mac guy, Avalon knew I would want the WiFi version that was still in development at the time, so they shipped my mount with the necessary hardware which was ready to go and then got the appropriate version of the StarGo software over to me as soon as it became available. I have to say, WiFi is nice to have and works well but most of the time I just use the wired controller because it can be operated easily in the dark. The hand controller attaches to the mount via a standard RJ45 ethernet straight-through cable, so I was able to cut and crimp my own to length using a really nice low-memory CAT5e cable I had. I’ve read comments about the hand control being too “plasticky” and even having a “Fischer-Price” feel. I can see where these criticisms are somewhat valid. If there’s one thing in the entire package that doesn’t seem to fit the overall aesthetic, it is the hand controller. To me though, it’s a minor issue. It works every time I’ve needed it to, it’s lightweight, and it doesn’t get cold or dewy. (Pick your battles, right? Maybe the housing can stay plastic, but if the buttons were made of metal, it would add to a more solid feel. I dunno, who cares? :) I don’t, moving on.) While the more diminutive M-zero has to house its StarGo externally in a module that hangs from a leg of the tripod, the M-Uno has the luxury of size/volume to allow the StarGo to be embedded neatly within the fork arm, cutting down on a lot of clutter. In either form though, the StarGo hardware behaves the same.
Once aligned, the feast begins. Acquiring your target, getting focused, and guiding started is a snap. PHD2 does a very good job keeping the M-Uno on target, as does the autoguider program within TheSkyX. Additionally, I spent some time working with an energetic new astrophotography software company from Europe called Cloudmakers Inc. that have released a suite of lightweight, inexpensive AP apps for the Mac on the App Store called AstroGuider and AstroTelescope that now both support the M-Uno. They also have apps for Nikon/Canon DSLR control, CCD/filter wheel control and more. I seem to mostly use PHD2 due to their drift alignment routine, the control levers it offers and the minimum pulses it sends over my ST4 cable to keep the M-Uno on target. PHD2’s latest Mac offering is really stable and it can be downloaded here for free. On nights where seeing is reasonable, I can see PHD2 sending only occasional pulses, once every 5-10 seconds or so. Guiding at a 2m focal length, total error usually lives between .2” and .5” with my crappy, turbulent, light-polluted San Jose skies. Even in more turbulent seeing conditions, guiding is usually below 1” of total error, and I still get perfectly round stars. It’s almost miracle-like, and at times feels a bit like cheating.
RA oscillation under .1!? Over a 100 second period, PHD2 made 8 RA corrections, and 2 corrections on the DEC axis
This mount was made for astrophotography. Being a belt-driven system, any periodic error is averaged out over the entire length of the toothed belt in contact with the pulley, vs the one single point of contact between to unforgiving metal gears. Periodic error exists in every drive mechanism, but it’s simply undetectable on the M-Uno. There’s also zero backlash, hence their name “Fast Reverse”- When you change the motor’s direction, the mount changes direction. There’s no slop to take up as gears switch direction and momentarily break contact. You tell it to move, it moves and the feeling is satisfying. As it stands, I have yet to drop a frame due to anything the M-Uno has done wrong. Even when first starting out with the mount, it was very forgiving of my inexperience. Yeah, I still lose a frame every once in awhile... I’ve had earthquakes, bumped the tripod, satellites and other weirdness will fly through my frame, and I get your typical C8 mirror flop that likes to ruin a frame here and there... Once I even had a barn owl land and perch on the top handle of my C8. None of that is the fault of the M-Uno, however. It’s the first mount that I’ve actually felt secure enough letting it run unattended while I catch a few winks or work on something else.
IC 1396A - Elephant Trunk Nebula - 12.5 hours total integration
Derek mentioned in his review that if it weren’t for CCD saturation, he could expose indefinitely and I have to agree. The longest exposure I ever took on my AVX was 30 minutes and I really had to work for it - a celebrated one-time event. With the M-Uno, almost every frame I shoot is 30 minutes. No celebration necessary. That’s Danza’s job and she simply loves doing it. Once, just to see if I could, I fired off a 3600 sec shot and of course, it came out perfect. There’s nothing with this mount that limits my ability to get an exposure. If I get 4 hours of time on an object as it traverses the sky over my back yard, I have come to expect close to that in exposure at quitting time. Without that %$#&ing meridian flip, having all of my light frames facing the same direction at the end of the night is a delicious treat. My image sets are so predictable and uniform now, I don’t even really need to register images that are shot within the same session. Yeah okay, image registration is still done as part of my automated workflow but I can take a .fit from the beginning of the night, manually stack it on top of one from the end of the night and there’s zero difference in position. If you don’t stop guiding, you won’t be cropping anything after stacking.
I have learned more about astrophotography and improved more in the last few months, than in the first two years before I owned my M-Uno. It has taken all the monotony and troublesome aspects of the hobby and cleared them from my path, allowing me to focus more on improving my data acquisition and post-processing. I wish I had known about Avalon sooner. I guess that’s why I felt compelled to write this review. I really do want to spread the word here in the States. There’s no reason I should be the 3rd owner of this mount here. That has to change. I have coined the hashtag, #AvalonEvangelista because at times, I feel the need to shout its merits from the rooftops. Perhaps it’s because Avalon’s price / payload is a little higher than their domestic Paramount counterparts. The extra price of admission, in my opinion, is totally justified and it is quickly forgotten the first time you see your imaging rig go inverted and just keep on going. It still tickles me endlessly every time I see it and I don’t think you can ever really put a price on that.
M20 Trifid Nebula in 2-channel narrowband - only 2.2 hours total integraion
I have decided that due to the success of the M-Uno and with the pending arrival of my new sextuplet astrograph, that Danza needs a little sister. The portability of the M-Zero is just too good to pass up. “Nuvoletta” or “Little Cloud” should hopefully be leaving Italy in the next few weeks. Getting horizon-to-horizon ability in something that weighs less than 20 pounds is a dream come true. I am truly excited at what the M-Zero is going to bring to my hobby... A hobby I wanted so badly to love before, but was never allowed to. Avalon has changed all of that. Now that my time is no longer being wasted, I can’t wait to get outside and gather.
This review really could and should be so much longer and have more technical statistics and figures, but I just want to get the word out to beginners and advanced photographers alike... If you are in the market for an well-engineered astrophotography mount that’ll blow your mind, you owe it to yourself to give Avalon Instruments a look. Send them an email and see what I’m talking about for yourself. I’m sure I will have more to say to as I continue to evolve with this wonderful miracle of machinery.
If you’d like to follow the progress of my work on Avalon hardware, please follow me and my partner Tom Masterson on Facebook at https://www.facebook.com/transienta... or on Astrobin at http://www.astrobin.com/users/trans...
Avalon also makes a more “traditional” belt-drive EQ mount called the Linear Fast Reverse. If you’d like to learn more about that model, you can do so here. - If you’re interested in seeing some world-class examples of its capabilities, go and follow the work of Sara Wager at Swagastro. Caution: extreme eye candy ahead
If you’d like to contact me regarding anything you’ve read here or in Derek’s review, or have any questions I might be able to answer, please feel free to contact me via private message or email at This email address is being protected from spambots. You need JavaScript enabled to view it. - I’d be more than happy to help.
Thanks for reading! Clear skies!!!
- Tom Bramwell - Transient Astronomers
(The original review can be read at this link: https://www.facebook.com/notes/tom-bramwell/avalonevangelista-an-owner-review-of-the-m-uno-fast-reverse-mount-for-astrophoto/10157363192730596)
{galleria}Galassie/tom-bramwell/gallery{/galleria}