


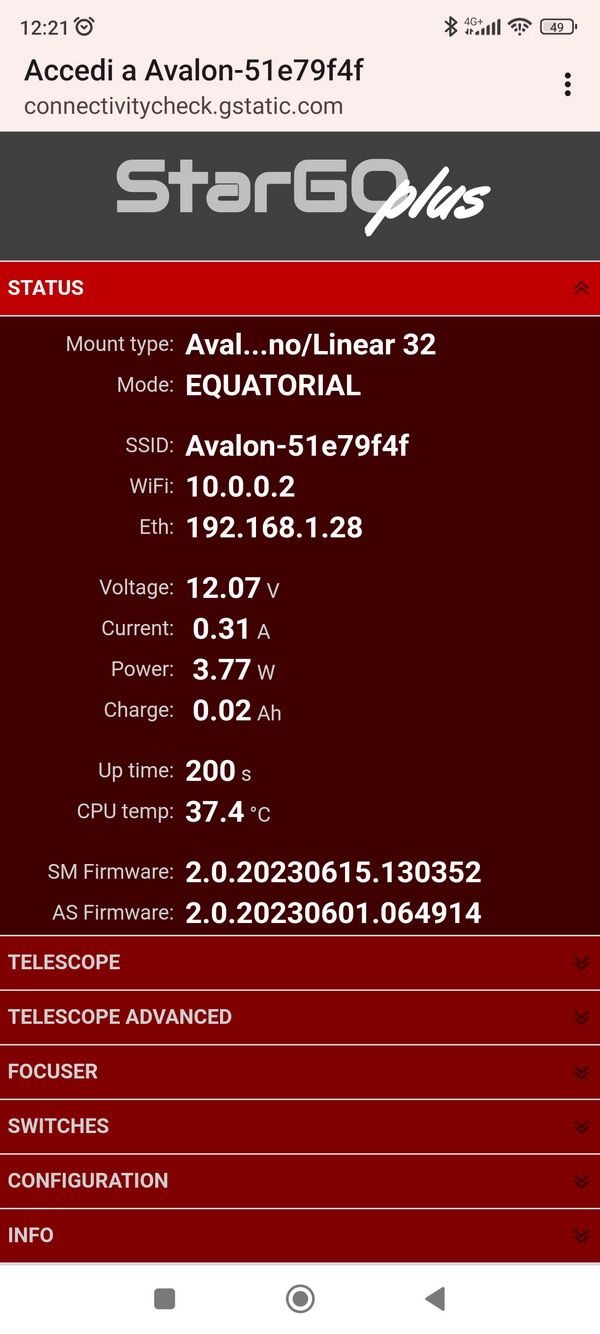
The StarGo Plus is a Raspberry Pi based controller that comes with a dedicated WebApp for a complete Astronomical setup management.
Below are described the two main connection methods:
Method 1: Through Smart Device
This method is the faster and smarter connection way, therefore is suggested as a first step to set up the basic system value as: I.P. address, mount configuration file, location coordinates input etc.
This connection method procedure is described below:
-
Power on the StarGo Plus by connecting the provided Power Supply to the Power 12V. Port
-
Wait few seconds until the Status Led begin to blink
-
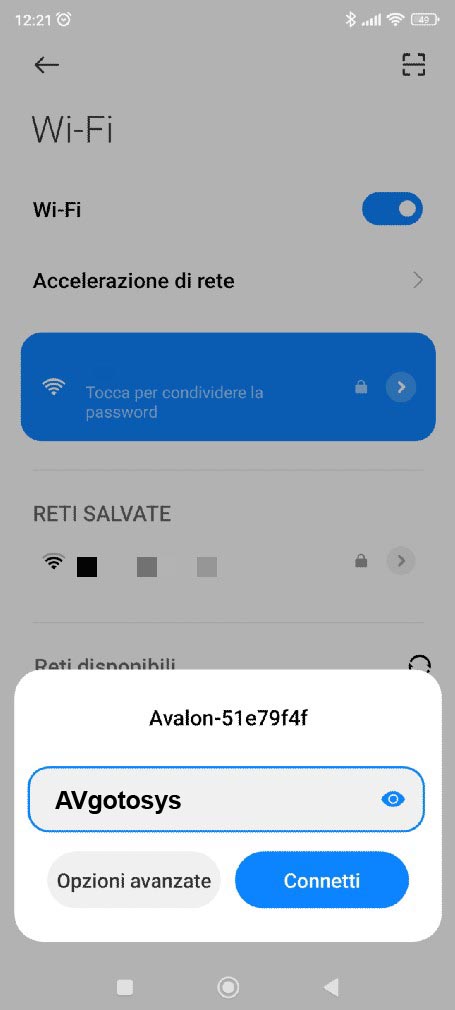
Search the StarGo Plus HotSpot network. The SSID WiFi name is divided in two parts: the first is common for every device and is “Avalon-”, the second is a 8 digits alpha-numeric code. So the SSID WiFi name will be something like “Avalon-xxxxxxxx”. In our sample the SSID is “Avalon-51e79f4f”. The default password is: “AVgotosys”
-
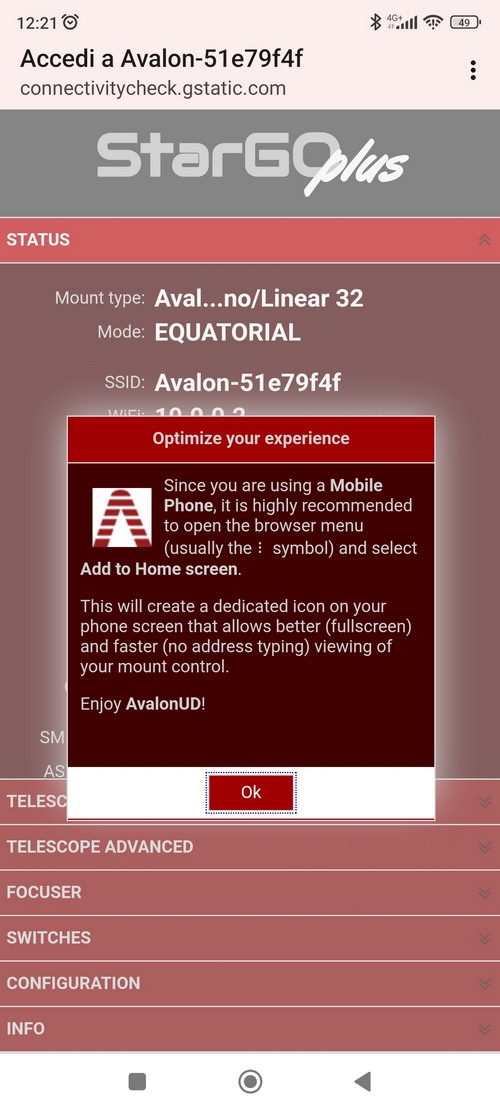
After the connection will be established, tap on the Access to WiFi network pop up windows and the WeApp will be opened by the device default browser.
Method 1: Throug PC
The PC access requires to know the StarGo Plus IP address.
For a quick connection it will be possible to directly connect to the StarGo Plus. In this case the procedure will be similar to the smart device aforementioned, below is described step by step:
-
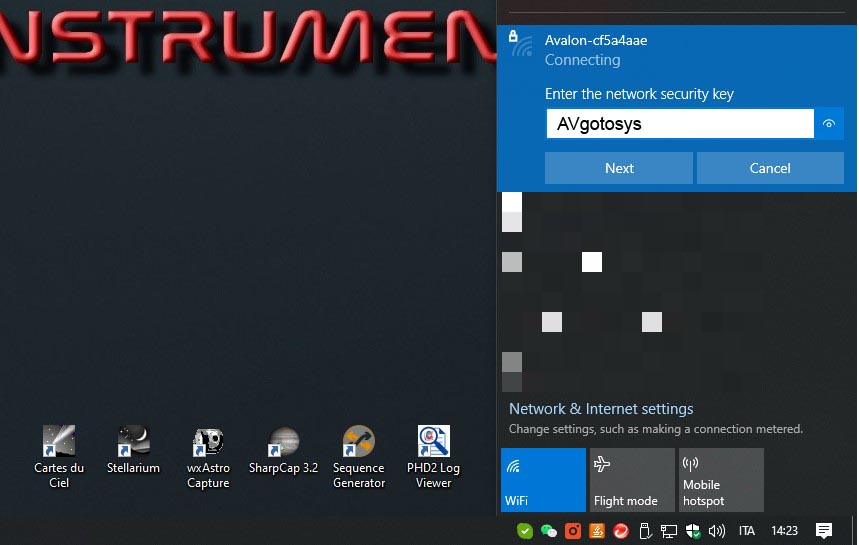
Search the StarGo Plus HotSpot network (in this example the WiFi SSID name is: Avalon-cf5a4aae) and connect using the default password: AVgotosys
-
Soon after the connection will be required to open any kind of web browser installed on the pc and type on the url string the default StarGo Plus WiFi IP: 10.0.0.2
This method is suggest as a quick connection with the PC but in order to have a reliable connection with the StarGo Plus, for an Astrophotographic session and a complete control of the setup, is suggested the Ethernet cable connection, connecting the StarGo Plus to the router.
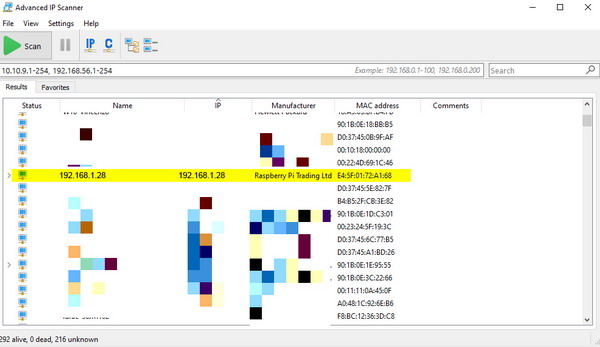
In this case will be required to know the IP assigned to the StarGo Plus from the router. This information can be found in two way: accessing to the router or using IP scan software. In the sample below is shown the IP scan software example:
After the correct address has been found, by typing it in any web browser installed on the PC, it will be possible to access the WebApp