


Ekos comes provided with a powerful and useful tool that allows to perform an accurate Polar Alignment even in location where the Polaris is not visible.
The procedure is quite straightforward, the mount will perform three different rotations on the RA axis, shooting a picture for each one.
Thanks to the Plate Solving, the software receive the precise position of each rotation and, calculating the overall movement, is able to estimate how much the RA axis is drifting away from the real North, guiding the user to perform the required corrections.
Kstars Ekos Polar Alignment requirements
• INDI Driver properly installed and working
• Plate solving configured
• Ekos profile
• Camera connected and fine focused
Test instrumentations
• Mount: Avalon M-zero OBS
• Camera: ZWO Asi 294 MC pro
• Telescope: TS Imaging Star 65Q con ZWO EAF
• Raspberry pi4 con Astroberry
1 – Kstars setup
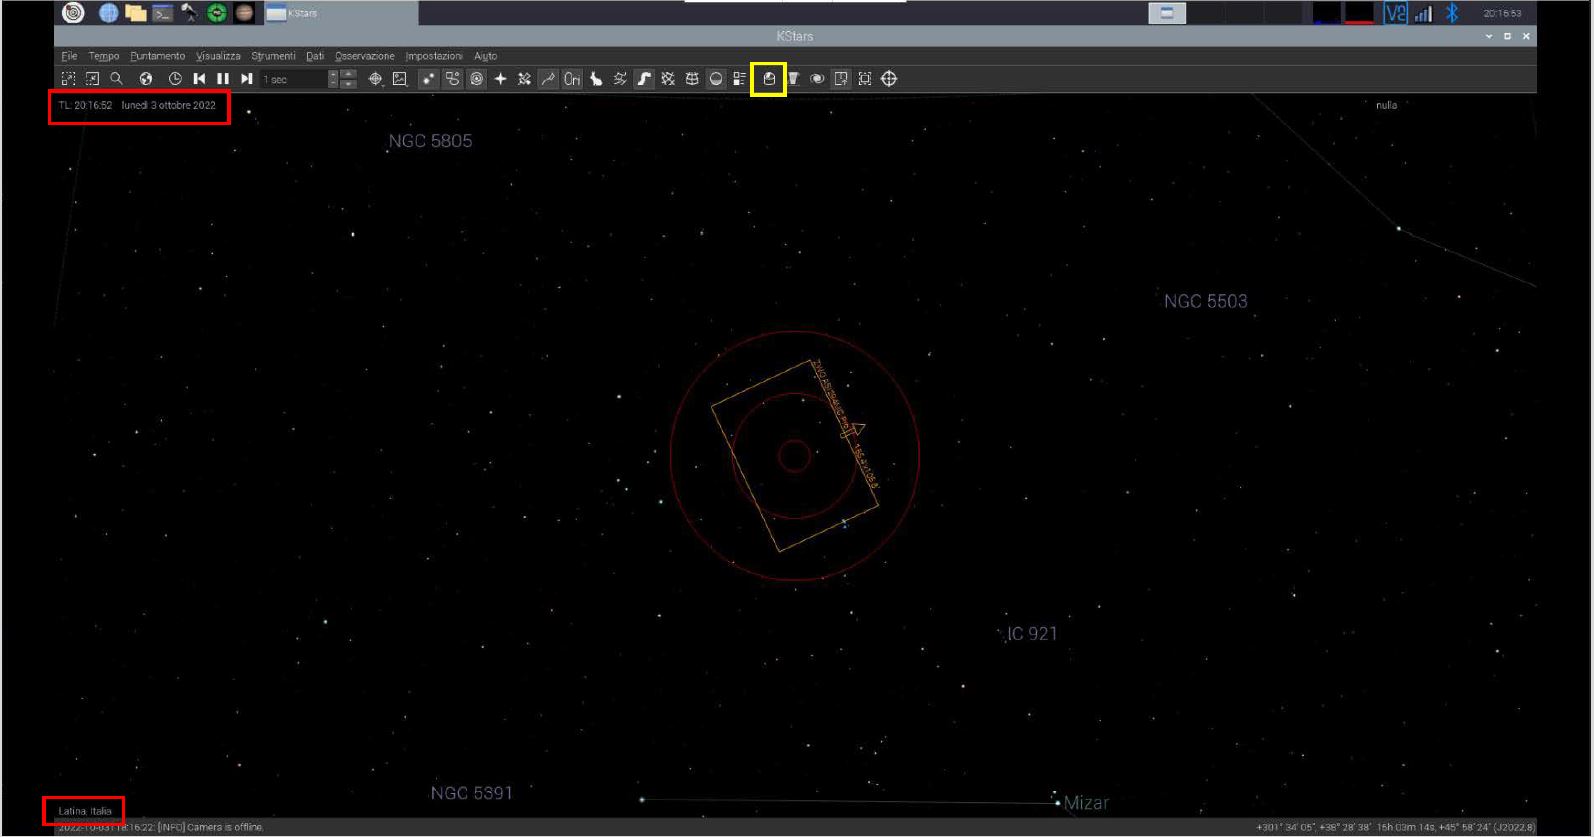
The image above shows the Kstars opening window. In the two red rectangles are highlighted: day, time and location. It is important to check the accuracy of the mentioned data, considering that the Raspberry doesn’t come provided of a backup battery, in case the setup run offline, they may be wrong, affecting the Plate solving result. After the data, time and location accuracy check, it will be possible to click on the Ekos connecting button highlighted in the yellow square.
2 – Ekos
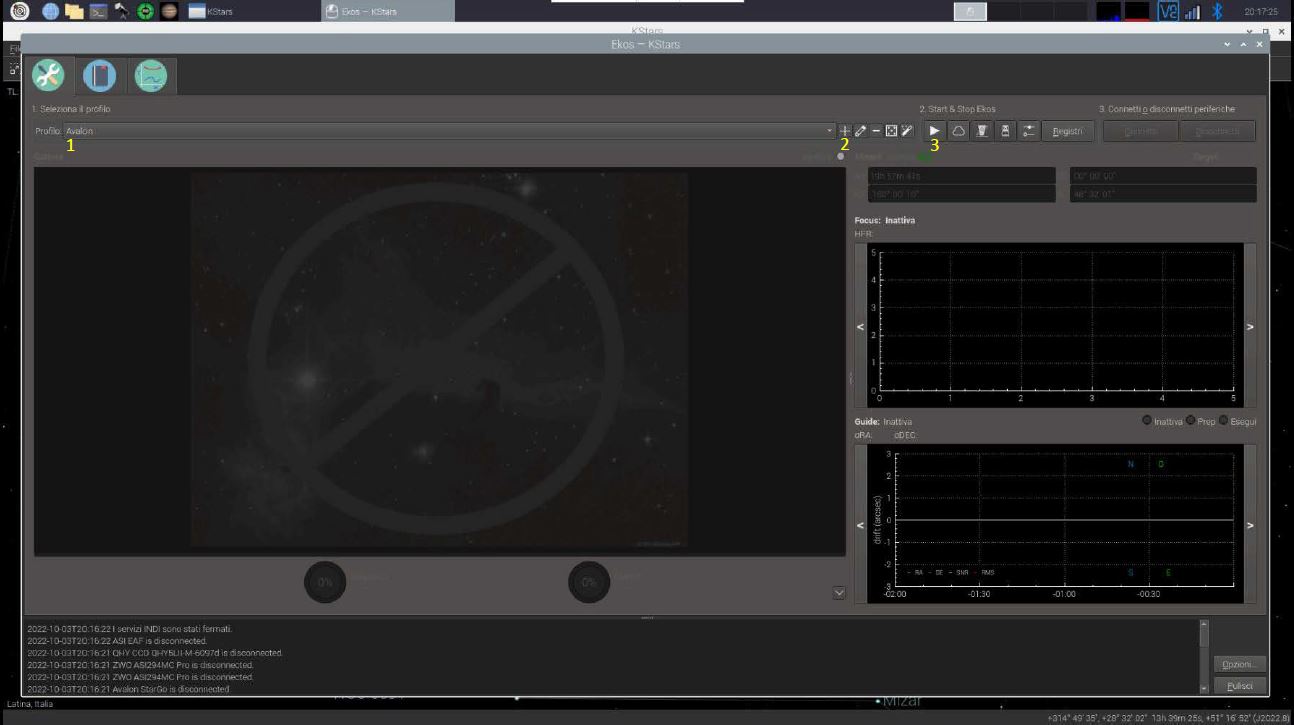
Inside Ekos it is possible to select the corresponding setup instrumentation (1) otherwise we can create a new one (2). Afterwards Start the session clicking on the Play button (3).
3 – INDI
After clicking on the Play button the INDI control panel will pop up, after checking that everything is properly connected is possible to close the windows.
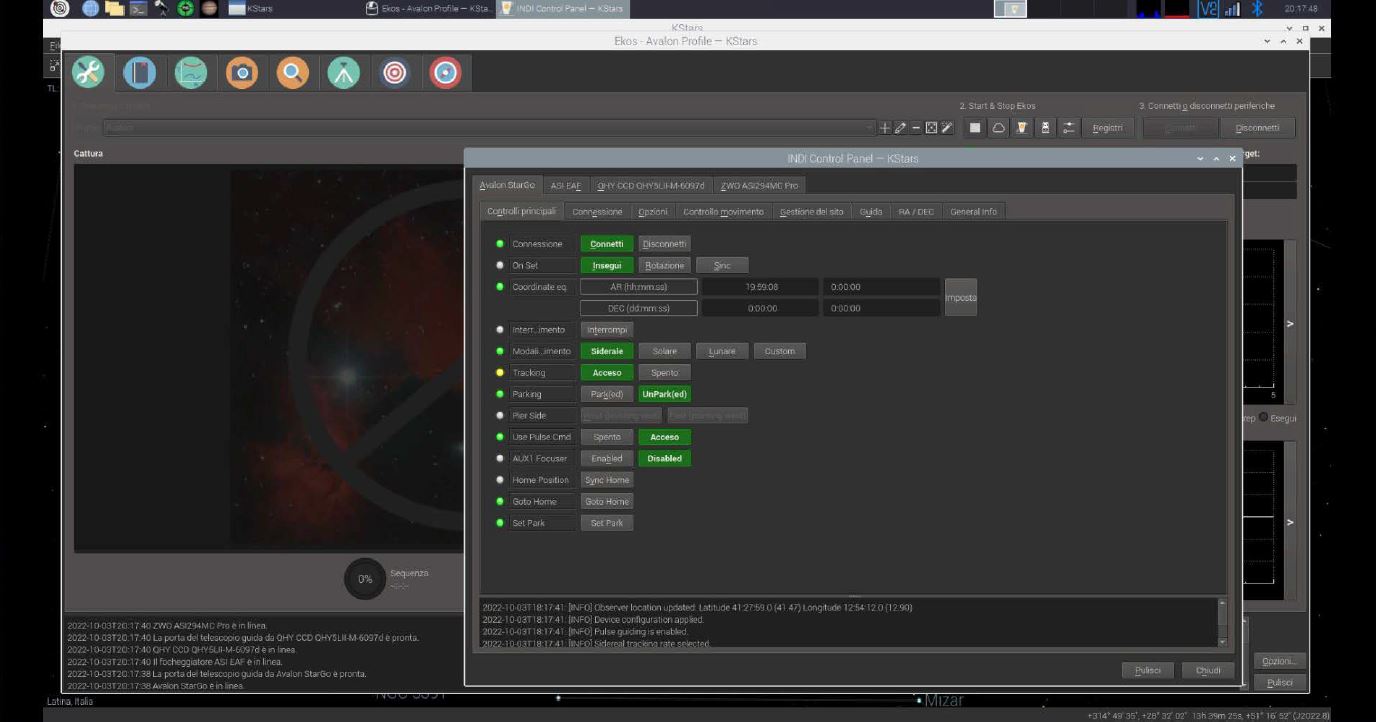
4 – Mount setup
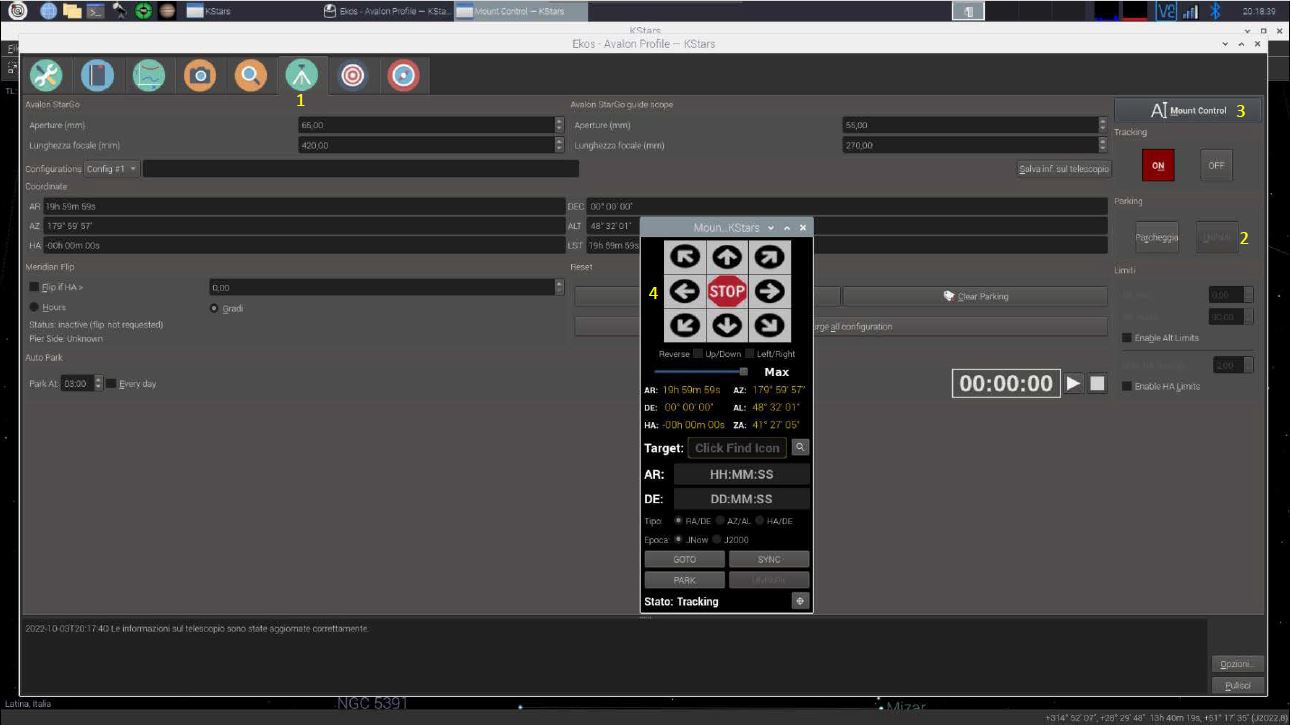
Select the mount tab (1) and, in case it is parked, unpark it (2). In order to move the mount in the Polar Alignment starting position, open the mount directional control panel (3). Considering that will be required a wide range rotation on the RA axis, let perform to the mount a wide movement range.
5 – Starting Sync
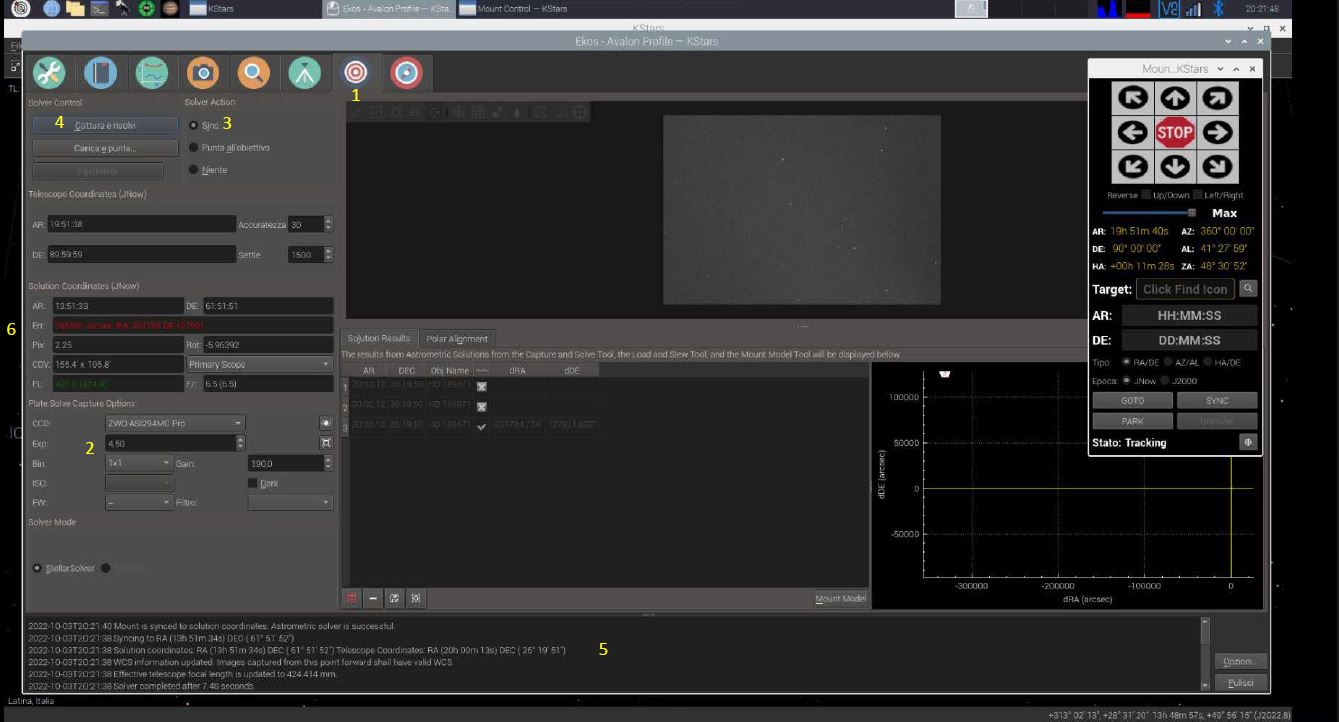
Move on the alignment tab (1). Even though is not strictly required, is suggested to perform a first Sync in order to allow the software be aware about the precise mount position. This allow to verify that the Plate Solving will work correctly.
In order to check this, is required to configure the camera (2) and select the simple Sync solver (3), in this way the mount will not move at all but the telescope real position will be updated with the real one.
Start the procedure (4). It is possible to follow the process watching the bottom bar (5). Once the operation will be completed the updated data will show up.
Troubleshooting
Ekos/Kstars crash
This condition may happen in case the Plate Soving is not properly configured or due to a too high mismatch position gap, between the one initially displayed in the software and the real one.
Solution
• Check the data, time and location as suggested above.
Solver Failed
This issue is related to the solver that is not able to properly identify the position, this condition may be due to several reasons.
Solution
• Increase the camera exposure, check data, time and location.
• In case the setup run offline, check that all the index data it has been downloaded
• In case the system run online, check that the connection is good and stable.
• Try to move in a different position of the sky.
6 – Alignment setup
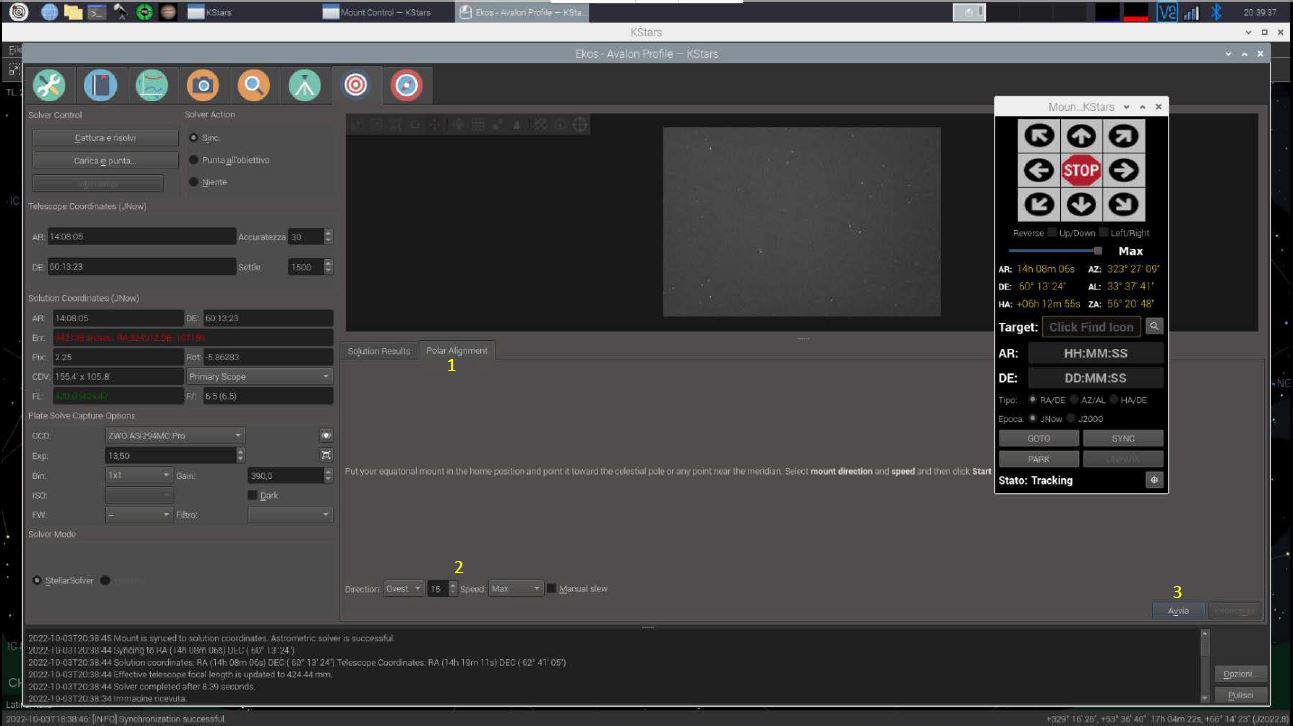
Everything is now ready for the Polar Alignment. Move on the corresponding tab (1), set up the degrees and rotation direction (2). Start (3). As shown in the image above, the movement control panel is active in top position, in order to be ready to be just in time and stop the mount in case of collision risks.
7 – Polar Alignment
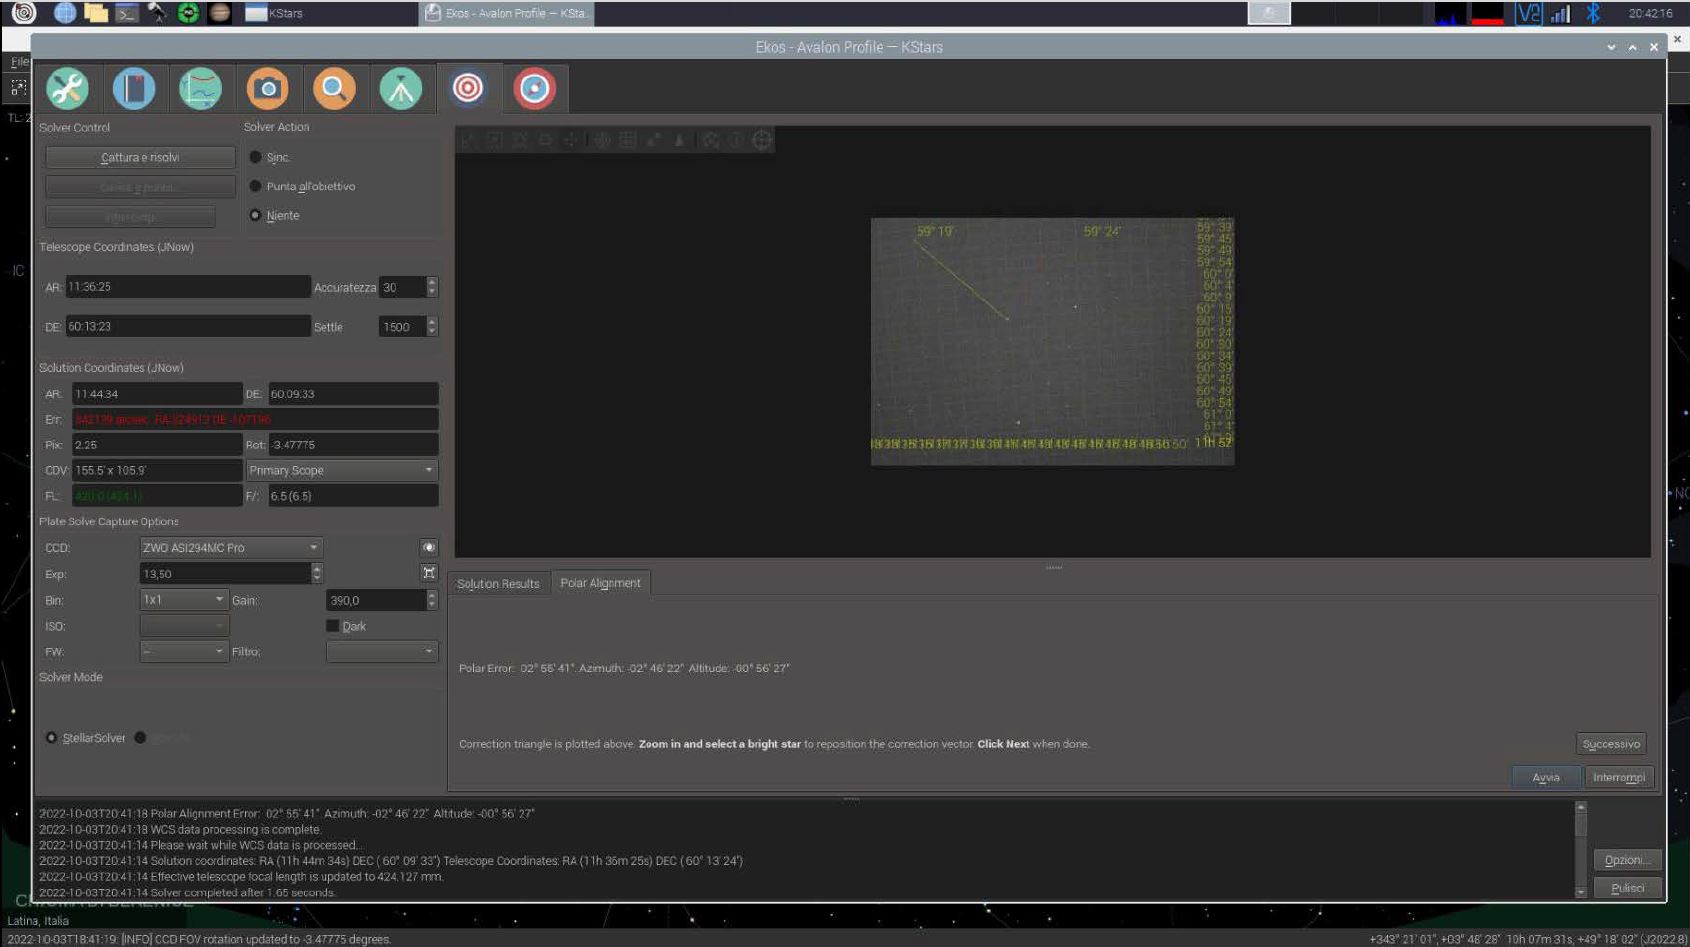
The procedure is automatic, it will be performed three rotations and three shots, at the end of this initial procedure it will be displayed the amount of RA axis is misaligned compared to the real North. In the test performed the error is significant.
Troubleshooting
The mount get in stuck
The mount has not been unparked or the software is not aware about the mount position.
Solution
• Unpark the mount
• Perform a Sync as explained on point 5
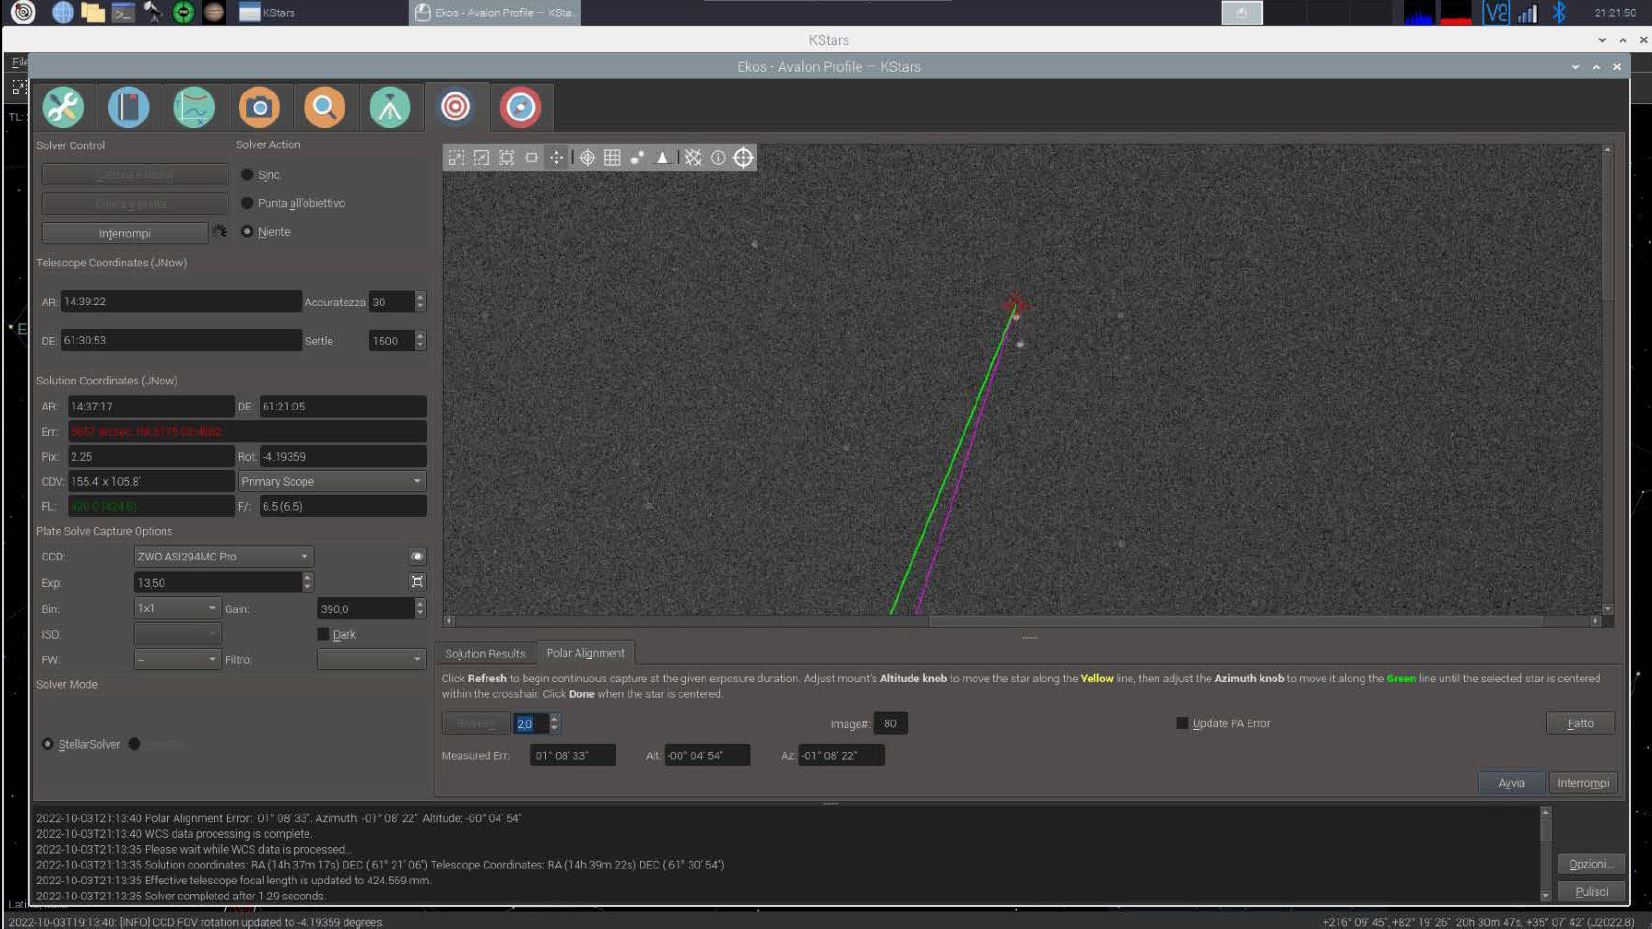
8 – Polar Alignment, reference star
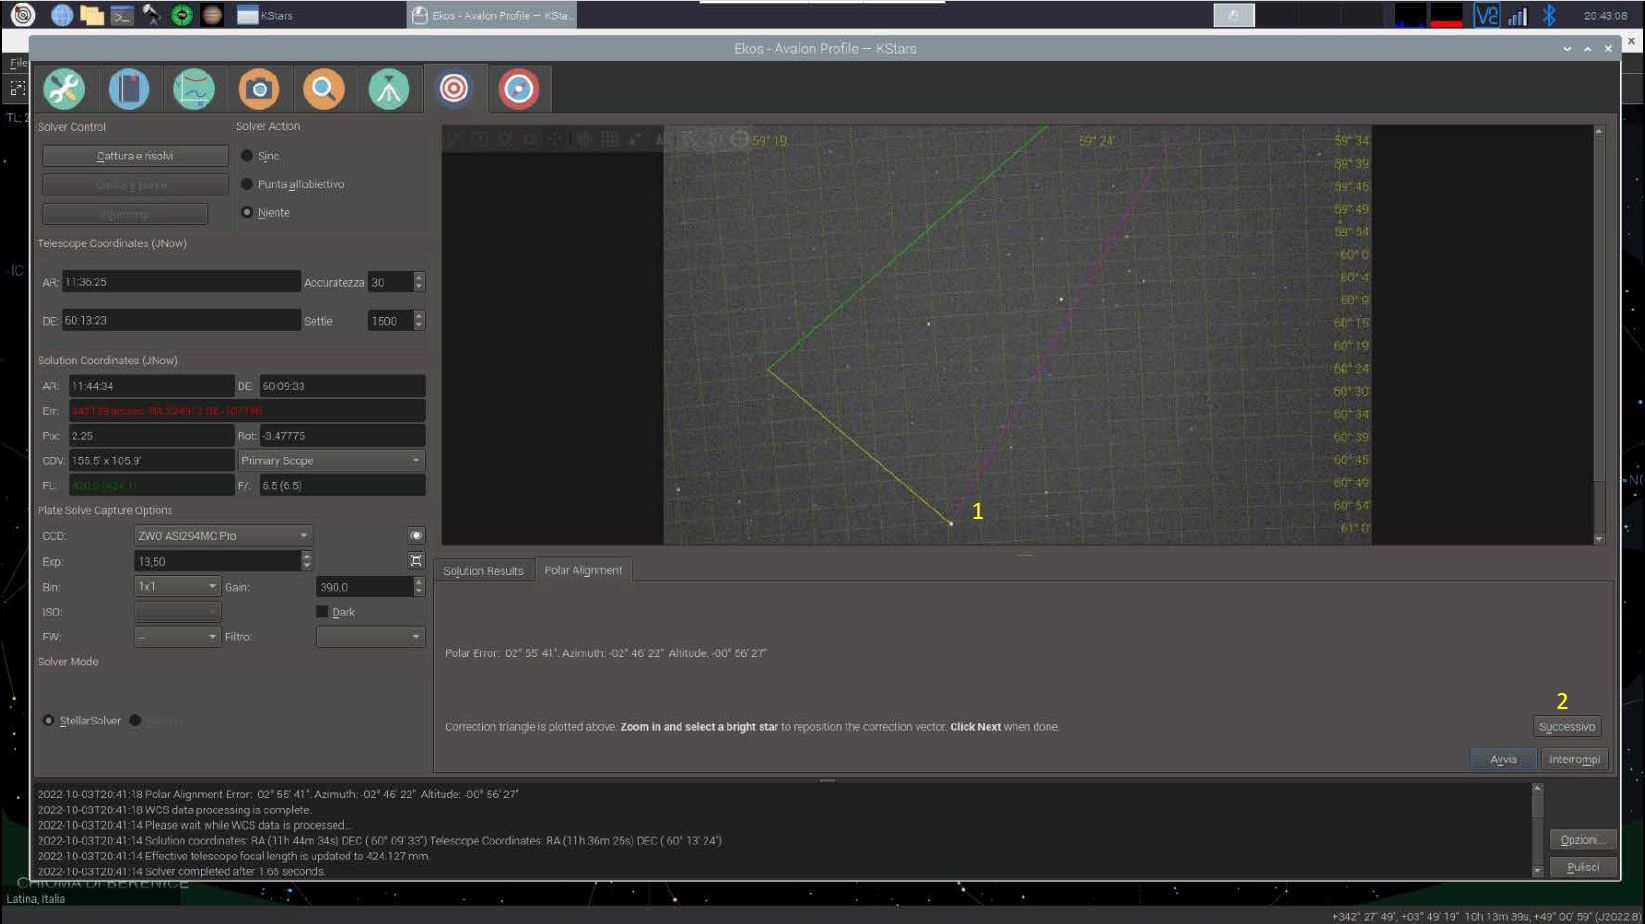
Select a brighter star to use as a reference (1) for the movement on the two axis displayed in yellow and green and go on clicking on the “Next” (2) button.
NOTE: clicking on “Start”, the procedure will restart from the beginning whereas clicking on stop the procedure will be stopped.
9 – Polar Alignment
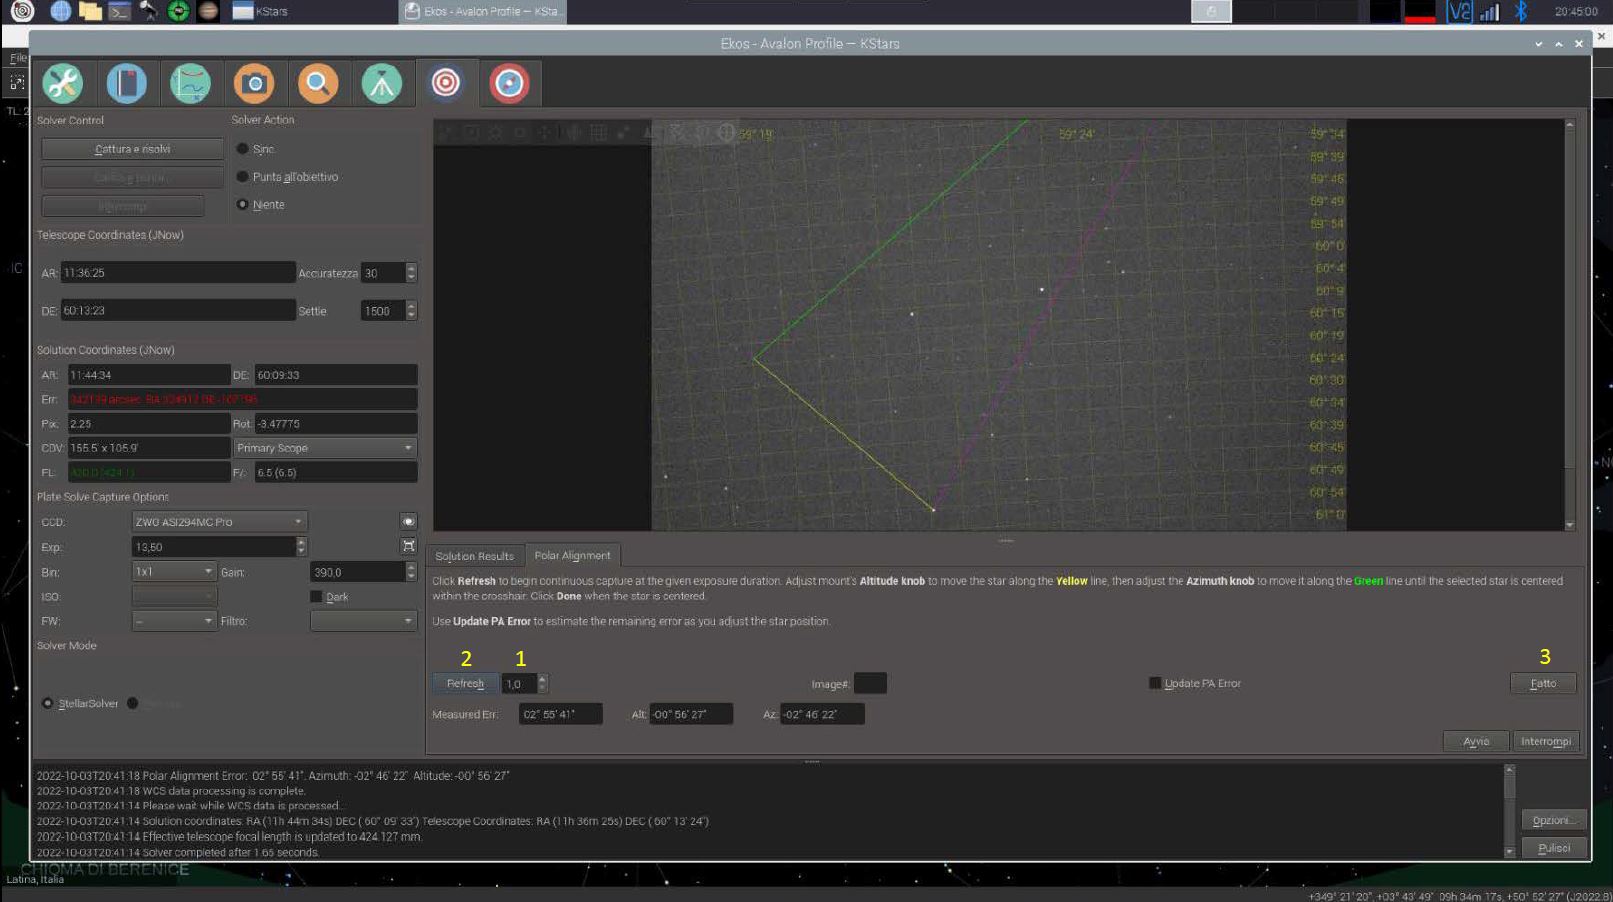
Set the exposure time for each shot (1) start with the refresh (2), working on the two axis, move the star on the yellow and green line as long as the correct position is achieved. Once finished stop the procedure (3).
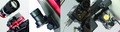
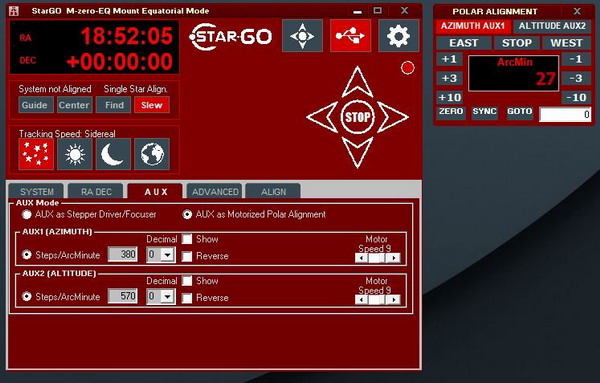
With standard Equatorial mounts, this procedure must be done manually with knobs, screws etc.. but thanks to the Avalon Motorized Polar Alignment System, this can be done remotely and in a more comfortable way with the dedicated PA software GUI.

Motorized Polar Alignment Kit
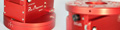
StarGo Polar Alignment Tool
In the test, due to the total error amount, the axis meeting point cannot be seen, once achieved the nearest point, we can stop the procedure and perform a new Polar Alignment. In this case is suggested to perform the rotation in the opposite direction, allowing the telescope coming back in the starting position.
Repeat all the steps mentioned above and when the meeting point is achieved the Polar Alignment is completed.