The SG+/Pro (StarGo Plus/StarGo2 Pro) are Raspberry Pi based Astronomical control system, they have been designed to work in two main hardware connection methods:
- Method 1: StarGo Plus as a Hotspot
- Method 2: StarGo Plus connected to your network, via LAN or Wi-Fi
Usually the method 2 via LAN is accomplished by using an Ethernet cable connected to a router.
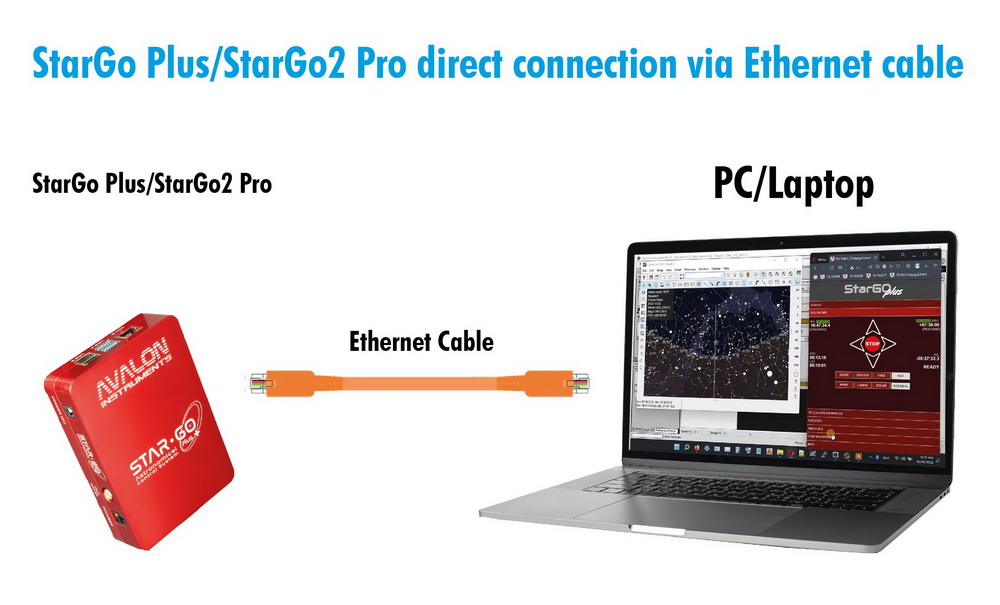
However, it is also possible to connect the system directly to the PC with the same ethernet cable, without passing through the router. This method can be really useful on the field for a smart and very simple connection.
Below is explained the procedure:
-
Connect the StarGo Plus/StarGo2 Pro to the PC Ethernet port by using an Ethernet cable
-
Connect via WiFi to the StarGo Plus/StarGo2 Pro hotspot from any kind of device (Smartphone, Tablet or PC). This step is required to maintain the connection with the system for the Ethernet port proper setting.
-
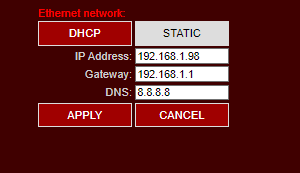
In StarGoPlus/StarGo 2 Pro WebApp configuration tab, set the Ethernet network as STATIC IP and fill the IP address fields. In our example we used the following typical settings values:
IP Address: 192.168.1.98
Gateway: 192.168.1.1
DNS: 8.8.8.8
-
Click on the APPLY button and REBOOT the system.
-
Access the PC Ethernet settings and edit the IPv4 options assigning a Static IP address (the last IP number must be different from the one set on the StarGo). In our example we used the following typical IP settings values:
IP Address: 192.168.1.97
Subnet mask: 255.255.255.0
Gateway: 192.168.1.1
DNS: 8.8.8.8

After this you can connect to the system on both the Hotspot WiFi and the Ethernet cable via VNC or Browser by simply using the IP address set before.
We suggest this kind of connection for the higher speed and reliability connection.